
While working on a new Mediawiki project, and trying to setup a Kubernetes cluster on Wikimedia Cloud VPS to run it on, I hit a couple of snags. These were mainly to do with ingress into the cluster through a single static IP address and some sort of load balancer, which is usually provided by your cloud provider. I faffed around with various NodePort things, custom load balancer setups and ingress configurations before finally getting to a solution that worked for me using ingress and a traefik load balancer.
Below you’ll find my walk through, which works on Wikimedia Cloud VPS. Cloud VPS is an openstack powered public cloud solution. The walkthrough should also work for any other VPS host or a bare metal setup with few or no alterations.
Step 0 – Have machines to run Kubernetes on
This walkthrough will use 1 master and 4 nodes, but the principle should work with any other setup (single master single node OR combined master and node).
In the below setup m1.small and m1.medium are VPS flavours on Wikimedia Cloud VPS. m1.small has 1 CPU, 2 GB mem and 20 GB disk; m1.medium has 2 CPU, 4 GB mem and 40 GB disk. Each machine was running debian-9.3-stretch.
- Master:
- master-01 (m1.small)
- Node:
- node-01 (m1.small) – Public IP
- node-02 (m1.small)
- node-03 (m1.medium)
- node-04 (m1.medium)
One of the nodes needs to have a publicly accessible IP address (Floating IP in on Wikimedia Cloud VPS). In this walkthrough we will assign this to the first node, node-01. Eventually all traffic will flow through this node.
If you have firewalls around your machines (as is the case with Wikimedia Cloud VPS) then you will also need to setup some firewall rules. The ingress rules should probably be slightly stricter as the below settings will allow ingress on any port.
- master-01
- Ingress, TCP, 2379 – 2380, default(cluster only)
- Ingress, TCP, 6443, default(cluster only)
- Ingress, TCP, 10250 – 10255, default(cluster only)
- node-0[1-4]
- Ingress, TCP, 10250, default(cluster only)
- Ingress, TCP, 10255, default(cluster only)
- Ingress, TCP, 30000 – 32767, default(cluster only)
- node-01
- Ingress, TCP, 1 – 65535, 0.0.0.0/0(any source)
- Ingress, TCP, 80, 0.0.0.0/0(any source)
- Ingress, TCP, 443, 0.0.0.0/0(any source)
- Ingress, TCP, 8080, 0.0.0.0/0(any source)
Make sure you turn swap off, or you will get issues with kubernetes further down the line (I’m not sure if this is actually the correct way to do this, but it worked for my testing):
sudo swapoff -a
sudo sed -i \'/ swap /d\' /etc/fstab
Step 1 – Install packages (Docker & Kubernetes)
You need to run the following on ALL machines.
These instructions basically come from the docs for installing kubeadm, specifically, the docker and kube cli tools section.
If these machines are new, make sure you have updated apt:
sudo apt-get update
And install some basic packages that we need as part of this install step:
sudo apt-get install -y apt-transport-https ca-certificates curl software-properties-common
Next add the Docker and Kubernetes apt repos to the sources and update apt again:
sudo curl -fsSL https://download.docker.com/linux/ubuntu/gpg | apt-key add -
sudo add-apt-repository "deb https://download.docker.com/linux/$(. /etc/os-release; echo "$ID") $(lsb_release -cs) stable"
sudo curl -s https://packages.cloud.google.com/apt/doc/apt-key.gpg | apt-key add -
sudo echo "deb http://apt.kubernetes.io/ kubernetes-xenial main" > /etc/apt/sources.list.d/kubernetes.list
sudo apt-get update
Install Docker:
sudo apt-get install -y docker-ce=$(apt-cache madison docker-ce | grep 17.03 | head -1 | awk '{print $3}')
Install the Kube packages:
sudo apt-get install -y kubelet kubeadm kubectl
You can make sure that everything installed correctly by checking the docker and kubeadm version on all machines:
docker --version
kubeadm version
Step 2.0 – Setup the Master
Setup the cluster with a CIDR range by running the following:
sudo kubeadm init --pod-network-cidr=10.244.0.0/16
The init command will spit out a token, you can choose to copy this now, but don’t worry, we can retrieve it later.
At this point you can choose to update your own user .kube config so that you can use kubectl from your own user in the future:
mkdir -p $HOME/.kube
rm -f $HOME/.kube/config
sudo cp -if /etc/kubernetes/admin.conf $HOME/.kube/config
sudo chown $(id -u):$(id -g) $HOME/.kube/config
Setup a Flannel virtual network:
sudo sysctl net.bridge.bridge-nf-call-iptables=1
kubectl apply -f https://raw.githubusercontent.com/coreos/flannel/master/Documentation/kube-flannel.yml
kubectl apply -f https://raw.githubusercontent.com/coreos/flannel/master/Documentation/k8s-manifests/kube-flannel-rbac.yml
These yml files are coming directly from the coreos/flannel git repository on GitHub and you can easily pin these files at a specific commit (or run them from your own copies). I used kube-flannel.yml and kube-flannel-rbac.yml
Step 2.1 – Setup the Nodes
Run the following for networking to be correctly setup on each node:
sudo sysctl net.bridge.bridge-nf-call-iptables=1
In order to connect the nodes to the master you need to get the join command by running the following on the master:
sudo kubeadm token create --print-join-command
Then run this join on command (the one output by the command above) on each of the nodes. For example:
sudo kubeadm join 10.68.17.50:6443 --token whverq.hwixqd5mb5dhjz1f --discovery-token-ca-cert-hash sha256:d15bb42ebb761691e3c8b49f31888292c9978522df786c4jui817878a48d79b4
Step 2.2 – Setup the Ingress (traefik)
On the master, mark node-01 with a label stating that it has a public IP address:
kubectl label nodes node-01 haspublicip=true --overwrite
And apply a manifest traefik:
kubectl apply -f https://gist.github.com/addshore/a29affcf75868f018f2f586c0010f43d
This manifest is coming from a gist on GitHub. Of course you should run this from a local static copy really.
Step 3.0 – Setup the Kubernetes Dashboard
This isn’t really required, at this stage your kubernetes cluster should already be working, but for testing things and visualizing the cluster the kubernetes dashboard can be a nice bit of eye candy.
You can use this gist deployment manifest to run the dashboard.
Note: You should alter the Ingress configuration at the bottom of the manifest. Ingress is currently set to kubernetes-dashboard.k8s-example.addshore.com and kubernetes-dashboard-secure.k8s-example.addshore.com. Some basic authentication is also added with the username “dashuser” and password “dashpass”
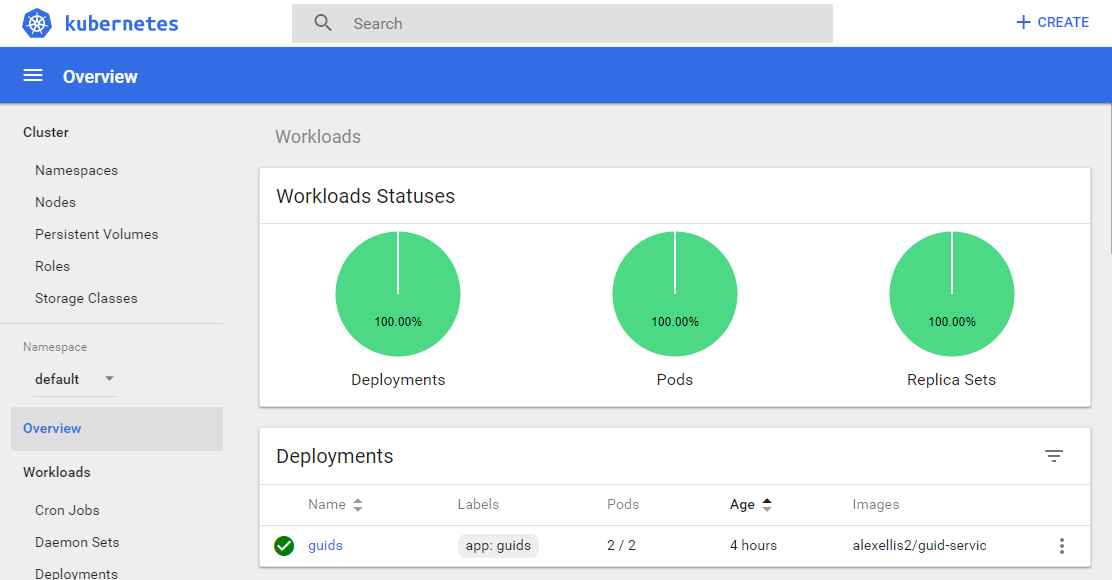
Step 3.1 – Setup a test service (guids)
Again, your cluster should all be setup at this point, but if you want a simple service to play around with you can use the alexellis2/guid-service docker image which was used in the blog post “Kubernetes on bare-metal in minutes”
You can use this gist deployment manifest to run the service.
Note: You should alter the Ingress configuration at the bottom of the manifest. Ingress is currently set to guids.k8s-example.addshore.com.
This service returns simple GUIDs, including the container name that guid was generated from. For example:
$ curl http://guids.k8s-example.addshore.com/guid
{"guid":"fb426500-4668-439d-b324-6b34d224a7df","container":"guids-5b7f49454-2ct2b"}
Automating this setup
While setting up my own kubernetes cluster using the steps above I actually used the python library and command line tool called fabric.
This allowed me to minimize my entire installation and setup to a few simple commands:
fab provision
fab initCluster
fab setupIngressService
fab deployDashboard
fab deployGuids
I might write a blog post about this in the future, until then fabric is definitely worth a read. I much prefer it to other tools (such as ansible) for fast prototyping and repeatability.
Other notes
This setup was tested roughly 1 hour before writing this blog post with some brand new VMs and everything went swimmingly, however that doesn’t mean things will go perfectly for you.
I don’t think I ever correctly set swap to remain off for any of the machines.
If a machine goes down, it will not rejoin the cluster, you will have to manually rejoin it (the last part of step 2.1).