The Wikidata query service is a public SPARQL endpoint for querying all of the data contained within Wikidata. In a previous blog post I walked through how to set up a complete copy of this query service. One of the steps in this process is the munge step. This performs some pre-processing on the RDF dump that comes directly from Wikidata.
Back in 2019 this step took 20 hours and now takes somewhere between 1-2 days as Wikidata has continued to grow. The original munge step (munge.sh) makes use of only a single CPU. The WMF has been experimenting for some time with performing this step in their Hadoop cluster as part of their modern update mechanism (streaming updater). An additional patch has now also made this useful for the current default load process (using loadData.sh).
This post walks through using the new Hadoop based munge step with the latest Wikidata TTL dump on Google clouds Dataproc service. This cuts the munge time down from 1-2 days to just 2 hours using an 8 worker cluster. Even faster times can be expected with more workers, all the way down to ~20 minutes.
Prerequisites
As this post uses the Google cloud Dataproc service you’ll need a Google cloud account with the Dataproc service enabled. You should be able to follow the steps using any Hadoop cluster but you might need to alter most of the commands.
You also need to have the latest latest-all.ttl.bz2 file downloaded from the Wikimedia dumps site or a mirror. After some testing I found that the dumps.wikimedia.your.org mirror appears to have the fastest download speed. The dump needs to be accessible from your Hadoop cluster.
For our project, that means downloading the dump to a bucket on a small instance.
curl https://dumps.wikimedia.your.org/wikidatawiki/entities/latest-all.ttl.bz2 | gsutil cp - gs://myBucketName/wikidata-all.ttl.bz2Code language: JavaScript (javascript)If you want to automate this step you could automatically spin up a small VM that runs a small startup script to download the dump to a bucket and then delete itself (or delete it like this). This VM needs the scope “compute-rw” so that it can write to a bucket.
Munging
First we need to create a new cluster that we can perform the munging on.
The below command will create a cluster with 8 workers which takes a couple of hours to munge the dump. For the WMF production WDQS munge step this is performed on a cluster of 64 machines and takes ~20 minutes.
gcloud dataproc clusters create query-munge-1 \
--subnet default --enable-component-gateway --image-version 1.3-debian10 \
--master-machine-type n1-standard-4 --master-boot-disk-type pd-ssd --master-boot-disk-size 60 \
--worker-machine-type n1-standard-8 --worker-boot-disk-type pd-ssd --worker-boot-disk-size 60 --num-worker-local-ssds 1 --num-workers 8Code language: JavaScript (javascript)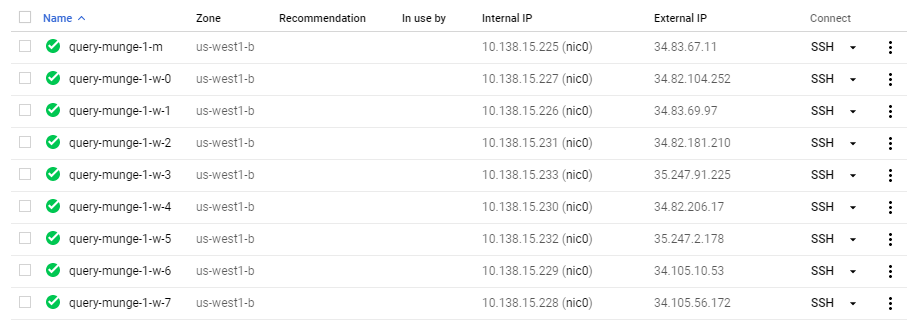
Then we need to fire up a job, referring to the dump that we have, that will perform the munge and write the data back to a bucket.
wget https://archiva.wikimedia.org/repository/releases/org/wikidata/query/rdf/rdf-spark-tools/0.3.49/rdf-spark-tools-0.3.49-jar-with-dependencies.jar
gcloud dataproc jobs submit spark --cluster=query-munge-1 \
--class=org.wikidata.query.rdf.spark.WikidataTurtleDumpConverter \
--jars=rdf-spark-tools-0.3.49-jar-with-dependencies.jar
\
--properties=spark.master=yarn \
--properties=spark.executor.memory=25G \
--properties=spark.executor.cores=8 \
--properties=spark.driver.memory=2G \
--properties=spark.dynamicAllocation.enabled=true \
--properties=spark.dynamicAllocation.maxExecutors=64 \
--properties=fs.gs.block.size=536870912 \
-- \
--input-path gs://myBucketName/wikidata-all.ttl.bz2 \
--num-partitions 512 \
--output-path gs://myBucketName/munged/nt \
--output-format nt \
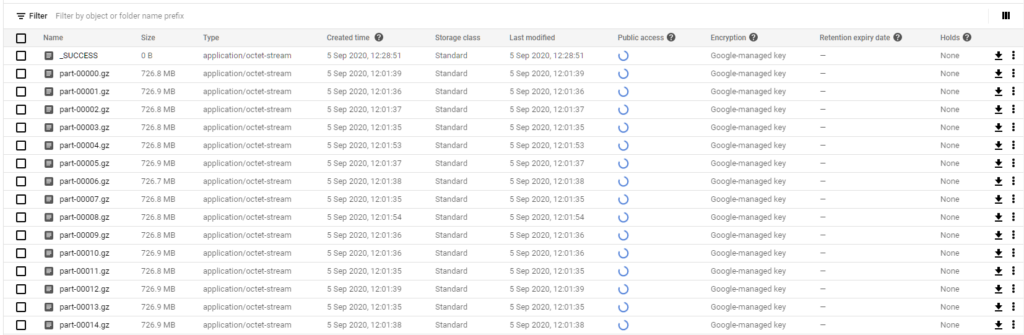
--skolemizeCode language: JavaScript (javascript)You’ll be able to monitor the job in the Google Cloud UI, and should slowly see the gzip files appearing in the bucket.
Once the job is complete you can delete the cluster.
gcloud dataproc clusters delete query-munge-1
Code language: JavaScript (javascript)
Preparing for load
I won’t talk about loading the data into blazegraph here, if you need a guide for that see this post.
One thing that you will need to do in order to make the wdqs load scripts read the files is to rename them slightly. When you come to grab the data from the bucket for loading on a host you can perform the download and rename as below.
gsutil -m cp -r gs://myBucketName/munged/nt /mnt/ssdRead

apt-get update
apt-get install -y rename

rename -v 's/(part-\d+)(\.gz)/$1.ttl$2/' /mnt/ssdRead/nt/*Code language: JavaScript (javascript)
Concluding
This is part 2 in a series of blog posts about running your own copy of the Wikidata Query Service. If you missed the first part, check it out here.
Many thanks to DCausse and the rest of the WMF search platform team for helping prepare and release the final patch needed for this post. Most of the code for the Hadoop munge step was written by the WMF team with only the final touch allowing export of gziped nt files being worked on by me.
You must be using the 0.3.49 version of WDQS jars or greater for this to work. There is not currently a wmde released docker image that lines up with this release.
The spark job should work on any Hadoop cluster. Google cloud is simply used as a convenient easily reproducible example.
I have not performed a full data load with this “flavour” of munged files yet, but it should be fine.
Thanks again for your great work. Could you advise on a quota error at the munging step? First, modified the code to add “–region global” due to an error from gcloud. the code is as follows
gcloud dataproc clusters create query-munge-1 \
–subnet default –enable-component-gateway –image-version 1.3-debian10 \
–master-machine-type n1-standard-4 –master-boot-disk-type pd-ssd –master-boot-disk-size 60 \
–worker-machine-type n1-standard-8 –worker-boot-disk-type pd-ssd –worker-boot-disk-size 60 –num-worker-local-ssds 1 –num-workers 8 –region global
selected region 52) US-Central1-a the first time and 53) US-Central1-b the second time after checking the quota was unlimited in Google.
ERROR: (gcloud.dataproc.clusters.create) INVALID_ARGUMENT: Multiple validation errors:
– Insufficient ‘CPUS’ quota. Requested 68.0, available 8.0.
– Insufficient ‘CPUS_ALL_REGIONS’ quota. Requested 68.0, available 16.0.
– Insufficient ‘IN_USE_ADDRESSES’ quota. Requested 9.0, available 7.0.
– Insufficient ‘SSD_TOTAL_GB’ quota. Requested 540.0, available 500.0.
I’m unable to change quotas in Google Cloud per the instructions here https://cloud.google.com/compute/quotas
Any advice?
It looks like you only have 16 CPUs available in all of your regios (per the error) so you would need to either increase the quotas or decrease the sizes of the machine or number of machines so that you only use 16 CPUs.
I think the CPUS error is then only 8 available CPUs in the region your using, so you might want to try a different region there too.
Increasing your quotas might require talking to whoever controls your cloud org / project!
Thank you for this post, really useful. Would you change anything in 2024 or would the setup be about the same? Do you know what would be the ideal instance type to run wikidata in terms of price/performance? Does more RAM make the queries much faster in your opinion. Many thanks for your help!
I imagine this setup using the same code versions still works today. I also imagine whatever the “new code” is probably works too, but i havn’t tried that and don’t even know if it has changed!
If you wanted to load the whole of Wikidata I’m not sure what the optimum specs would be, and that probably depends on your query load.
You can see what query.wikidata.org currently runs on at https://wikitech.wikimedia.org/wiki/Wikidata_Query_Service#Hardware