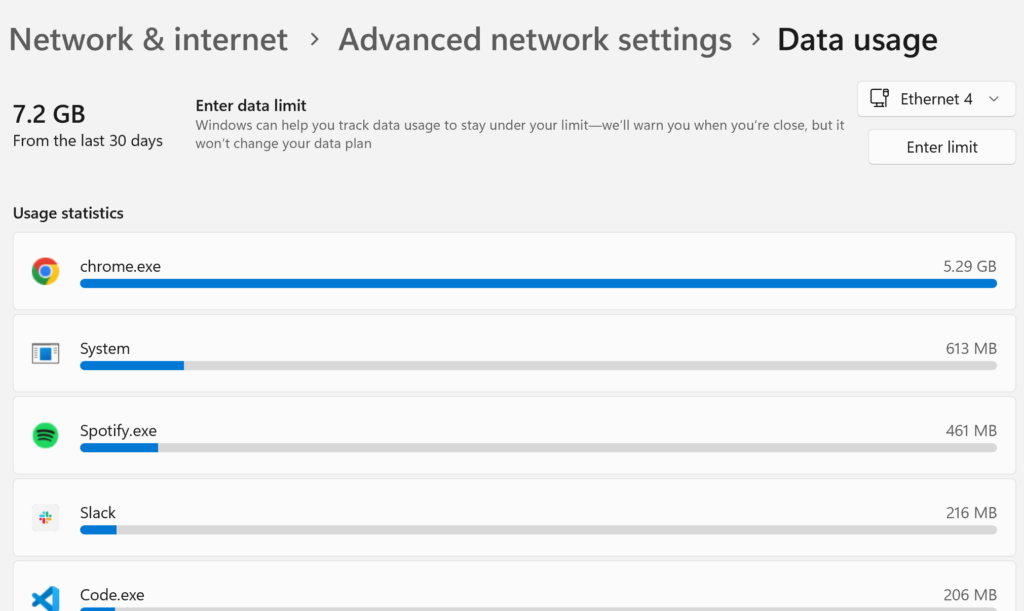
See all Windows 11 network data usage

Windows 11 (and possibly previous versions of windows) have a data usage view built into the advanced network settings view.

This feature allows users to monitor and manage their data usage on both Wi-Fi and wired connections, and I assume also data connections if your device can be connected via a SIM.

The Data usage page only allows you to see the current usage of networks that you are connected to, and doesn’t allow you to get a view of the whole picture.

For example, my current “Ethernet 4” usage is 7.2GB in the last 30 days, and the current Wi-Fi network that I am on has 97.1GB usage in the last 30 days.

However, I spend lots of time on other networks, and would love to know my overall data usage in the past 30 days.

Where is the data?

I figured all of the data was stored somewhere on disk, the real questions was where.

After a fair bit of googling I came accros “SRUM” or “System Resource Usage Monitor”, and “SRUDB.dat” referenced quite a lot:

Read more

If you have a sandwich and cut it in half, do you have one or two sandwiches

A few years ago, I asked a similarly silly question about lasagne to a group of people I know and summarized their responses. This time I’m bored on a coach, so asked 30–40 people the question “If you have a sandwich and cut it in half, do you have one or two sandwiches”.

In this post, I’ll occasionally refer to individuals by 2 letter initials to keep their personal sandwich views mostly private, while still allowing for a good laugh and for them to follow the analysis.

A few people that have ended up in both lasagne and sandwich groups noticed what I was doing and started reminiscing about the lasagne topic, shout out to HD, GC & LM…

From the provided opinions, there are several distinct groupings based on the perspectives shared.

But to introduce the problem, let’s take a look at this sandwich platter I found online, and how many sandwiches people think it delivers.

Read more

Autoreload go code on code change

For developers, the ability to autoreload code upon any changes is nothing short of a game-changer. It not only streamlines the development process but also fosters an environment of continuous improvement and experimentation.

There are so many packages for languages such as JavaScript for such a behaviour, but I struggled to easily find a simple-to-use go version with an example.

And that’s where this post comes in, as a simple to-the-point example extracted from what I learnt while reading https://dev.to/jacobsngoodwin/full-stack-memory-app-01-setup-go-server-with-reload-in-docker-62n

We will be making use of https://github.com/cespare/reflex, which is a go package and small tool to watch a directory and rerun a command when certain files change. 

Read more

Automatic cobra command registration with fx

Cobra is a popular Go package for creating CLIs. It provides a lot of functionality for creating commands, subcommands, and flags. However, it can be tedious to manually register all of your commands.

fx is a Go package that provides a dependency injection framework. It can be used to automatically register your application components, including but not limited to Cobra commands.

In this blog post, I will show you how you can use fx to automatically register your Cobra commands.

This code was written 5 minutes ago, but works, and I imagine it could help folks bootstrap more complex CLIs rapidly.

The problem

When you create a Cobra command, you need to manually register it with the root command. This can be tedious, especially if you have a lot of commands.

For example, the following code registers a command called hello:

func NewHelloCmd() *cobra.Command {
  cmd := &cobra.Command{
    Use:   "hello",
    Short: "Say hello",
    Run: func(cmd *cobra.Command, args []string) {
      cmd.Println("Hello, world!")
    },
  }
  return cmd
}

func main() {
  rootCmd := &cobra.Command{
    Use:   "myapp",
    Short: "My application",
  }
  rootCmd.AddCommand(NewHelloCmd())
  rootCmd.Execute()
}Code language: Go (go)

Read more

A copy-paste go SQL mock for GORM

When it comes to writing robust and reliable tests for your Go applications, having a well-structured and efficient testing setup is crucial. One common challenge in testing Go applications is dealing with database interactions. To ensure that your code functions correctly, it’s essential to create a controlled environment for database operations during testing. In this blog post, we’ll explore how to create a mock GORM database for testing purposes, allowing you to isolate and verify your database interactions in a controlled manner.

Here is some copy-and-paste code (explained below) which should get you started.

import (
	"github.com/DATA-DOG/go-sqlmock"
	"gorm.io/gorm"
	"gorm.io/gorm/logger"
)

func NewMockGORM() (GORM *gorm.DB, close func()) {
	db, mock, err := sqlmock.New()
	if err != nil {
		panic(err)
	}

	// GORM always runs this query, so mock it for all tests
	mock.ExpectQuery("SELECT VERSION()").WillReturnRows(sqlmock.NewRows([]string{"version"}).AddRow("5.7.0"))

	GORM, err = gorm.Open(mysql.New(mysql.Config{Conn: db}), &gorm.Config{Logger: logger.Default.LogMode(logger.Silent)})
	if err != nil {
		panic(err)
	}

	return GORM, func() { db.Close() }
}Code language: PHP (php)

The code block above defines a NewMockGORM function that sets up a mock GORM database instance for testing. Let’s break down what this code does and how it can be a valuable addition to your testing toolkit.

Setting up a Mock GORM Database

Read more

Verifying Wikimedia user page links on Mastodon

While reviewing the ongoings of the 2023 Wikimedia hackathon, I learned about the RealMe MediaWiki extension, which is already deployed to Wikimedia sites and allows verification of URLs that appear on user pages within other software or platforms, such as Mastodon.

Link verification for dummies

Imagine you want to show that your online profiles, like on Mastodon, truly belong to you. One way to do this is by using a special code called “rel=me”. It’s like saying, “Hey, this link over here is connected to me.” However, there’s a catch: both the link and the page it points to need to say they’re connected.

On platforms like Mastodon, you can add links to your other profiles. The platform then checks if those profiles also point back to your original page using the same “rel=me” code. If they do, your link gets a stamp of approval, showing it’s really yours.

The RealMe extension allows you to configure a set of links on your user page that include this “rel=me” special code that other systems, such as Mastodon, can check.

Configuring it

This one took me a few minutes to get working after reading the instructions, but on meta.wikimedia.org I added a link to my Mastodon profile, enabled the setting on meta, headed over to my Mastodon profile to add the link, and tada, it is verified!

Read more

Dependency injection in go using fx, and replacing services for test

I’m writing a new go application and ended up giving fx (by uber) a try for dependency injection. The getting started docs were brilliant for my use case (creating an API), but the examples for how to inject mock services for tests were lacking, so I decided to write some code examples of how I am currently using fx in tests.

General app setup

I set up my whole application in a app package, which pulls in all services that are needed.

Most of these are provided as constructor functions, with some more dynamic registration of routes as is done in the getting started docs.

package app

func New(additionalOpts ...fx.Option) *fx.App {
	return fx.New(
		fx.Provide(
			config.NewDefault,
			ses.NewSES,
			ses.NewEmailSender,
			mysql.NewGormGB,
			middleware.NewLimiterFactory,
			middleware.NewAuth,
			AsRoute(handlers.UserLogin),
			AsRoute(handlers.ListStuff),
			fx.Annotate(
				router.NewGinRouter,
				fx.ParamTags(`group:"routes"`),
			),
			server.NewHTTPServer,
		),
		fx.Invoke(func(*http.Server) {}),
		fx.Options(additionalOpts...),
	)
}Code language: Go (go)

Read more

Wikidata query service Blazegraph JNL file on Cloudflare R2 and Internet Archive

This entry is part 3 of 3 in the series Your own Wikidata Query Service

At the end of 2022, I published a Blazegraph JNL file for Wikidata in a Google Cloud bucket for 1 month for folks to download and determine if it was useful.

Thanks to Arno from weblyzard, inflatador from the WMF search platform team, and Mark from the Internet Archive for the recent conversations around this topic.

You can now grab some new JNL files from a few days ago, hosted on either the Internet Archive or Cloudflare R2.

Read more

Creating properties with statements using Wikidata Integrator

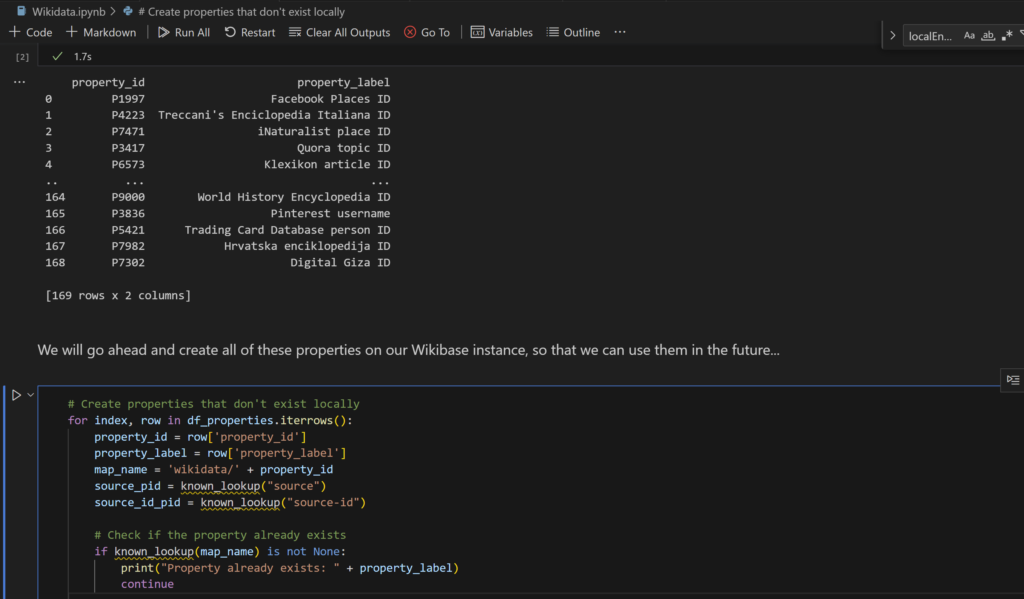
Wikidata Integrator is a Python library that simplifies data integration from Wikidata (and other Wikibases). It is written in Python, is focused on Wikibase concepts (as opposed to some libraries which are MediaWiki focused) and has a user-friendly interface.

I’m currently working on a demo Wikibase and decided to bring all of the data into the Wikibase making use of a Jupyter notebook, and Wikidata integrator was my choice library to use for this task. (Jupyter notebooks are interactive coding environments that allow users to create and share documents containing live code, visualizations, and explanations.)

Along that journey I found the Wikidata Integrator documentation lacking slightly, but I managed to get initial property and item creation working with little effort. However, I couldn’t get properties to create with statements already on them (needed a subsequent edit instead).

Read more

Wikibase and reconciliation

Over the years I have created a few little side projects, as well as working on other folks’ Wikibases, and of course Wikidata. And the one thing that I still wish would work better out of the box is reconciliation.

What is reconciliation

In the context of Wikibase, reconciliation refers to the process of matching or aligning external data sources with items in a Wikibase instance. It involves comparing the data from external sources with the existing data in Wikibase to identify potential matches or associations.

The reconciliation process typically follows these steps:

  1. Data Source Identification: Identify and select the external data sources that you want to reconcile with your Wikibase instance. These sources can include databases, spreadsheets, APIs, or other structured datasets.
  2. Data Comparison: Compare the data from the external sources with the existing data in your Wikibase. This step involves matching the relevant attributes or properties of the external data with the corresponding properties in Wikibase.
  3. Record Matching: Determine the level of similarity or matching criteria to identify potential matches between the external data and items in Wikibase. This can include exact matches, fuzzy matching, or other techniques based on specific properties or identifiers.
  4. Reconciliation Workflow: Develop a workflow or set of rules to reconcile the identified potential matches. This may involve manual review and confirmation or automated processes to validate the matches based on predefined criteria.
  5. Data Integration: Once the matches are confirmed, integrate the reconciled data from the external sources into your Wikibase instance. This may include creating new items, updating existing items, or adding additional statements or qualifiers to enrich the data.

Reconciliation plays a crucial role in data integration, data quality enhancement, and ensuring consistency between external data sources and the data stored in Wikibase. It enables users to leverage external data while maintaining control over data accuracy, completeness, and alignment with their knowledge base.

Existing reconciliation

One of my favourite places to reconcile data for Wikidata is by using OpenRefine. I have two previous posts looking at my first time using it, and a follow-up, both of which take a look at the reconciliation interface (You can also read the docs).

Read more